-spacing.png?width=385&height=100&name=mediavine-horiz-white-pn-RGB-(r)-spacing.png)
Each of the following steps can be completed before ads are live. They directly affect how accurately your earnings and reporting function once your site goes live, so taking care of them now helps prevent avoidable delays or data gaps. We're looking forward to getting you live. Here's what needs to happen first!
1. Log in to your Mediavine Dashboard
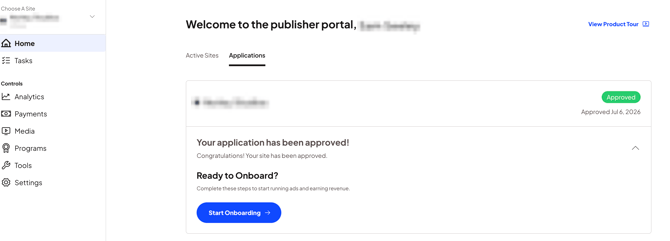
The dashboard is home to all active sites with Mediavine, as well as any applications. From the Home > Applications tab, follow the prompt to Start Onboarding.
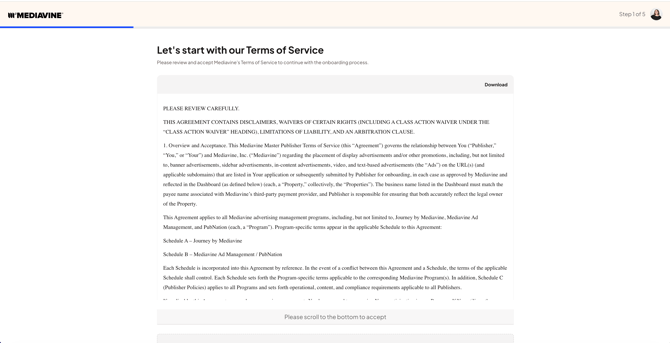
2. Review and Sign the Terms of Service
If you have signed the terms of service in the past, you will not be prompted with this step.
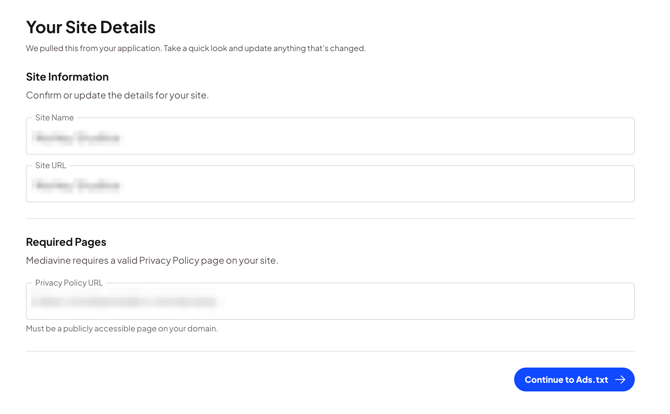
3. Confirm your site details
Verify the information that is pulled from your application.
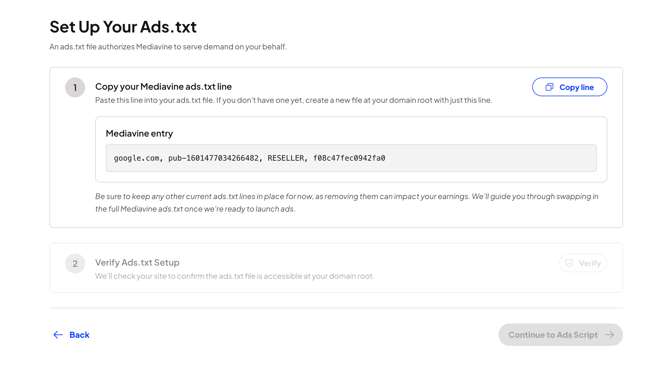
4. Set up your Ads.txt
Follow the prompts to download the full Mediavine Ads.txt, or add the Mediavine line to your current ads.txt file to continue working with your ad provider. You can learn more about setting up your ads.txt in this article. Once the ads.txt has been verified with a green checkmark, you can continue to ads script installation.
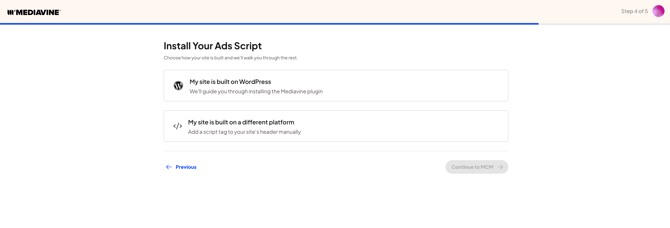
5. Install your Ads Script
Select the appropriate option for your site's platform, and follow the instructions. Once the site has been verified with a green checkmark, continue to MCM.
6. Apply to Google MCM
Verify the email address to receive the Google MCM Invite. If you have used AdSense in the past, be sure the same email address is being used. After selecting Send Google MCM Invite to This Email, a confirmation message will appear, and you will have the option to continue.
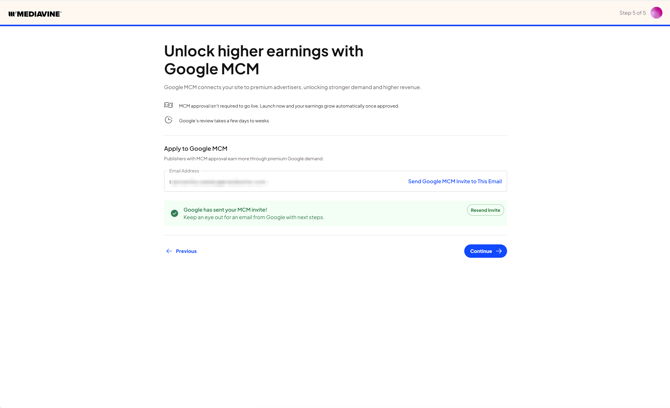
From here, you will be redirected to the homepage of the dashboard. Be sure to keep an eye on your inbox and follow the instructions listed in the invite email as soon as possible. The current status of MCM approval will be shown in the dashboard.
7. Ready for ad placements!
Once Google approves, our team will be notified, and a solutions engineer will work with you to target ads.
Additional Tasks
Required before you can get paid:
- Set up your Payment Profile.
After clicking on the task, you will be prompted to enter a name for your profile, followed by the option to select an existing payment profile or create a new one. From here, follow the steps on-screen to complete the process. Any payment-related questions can be directed to payments@mediavine.com. Required for launch.
Required for accurate earnings and reporting:
- Add your Privacy Policy
Navigate to Settings > Privacy Policy to verify the link in the dashboard is accurate, and the privacy policy language has been added. This is required to stay compliant and to keep your reporting accurate. Required for launch. - Connect to a Google Analytics account.
In your dashboard, go to Settings > Google Analytics 4. Sign in with Google, and select your GA4 property from the dropdown to connect it. Analytics information will not be available until the GA4 account has been successfully connected. Required for launch.
Recommended, especially if you have EU traffic:
- Enable the Mediavine Consent Management Platform.
This allows your EU readers to opt in to personalized ads, and is a GDPR requirement. If you have significant amounts of traffic from the EU, this can make a huge difference in your ad performance.
Recommended as a preventive check:
- Check for compatibility across current plugins.
Use this article to identify any potential problems with plugins that may impact the Mediavine script.
If you run into any issues with these steps, reach out to publishers@mediavine.com, and our support team can help.